1. Deploy an Amazon EC2 instance
If you are using the Cloud9 environment that you created in the Getting Started in the Cloud, please continue to the next section. Otherwise, please continue below.
In this section, you will spin up an Amazon instance that you will use to build a container, push it to Amazon ECR and submit your jobs to AWS Batch. To do so, you will:
- Deploy an Amazon EC2 instance
- Assign an Amazon IAM role to grant your instance the right to push containers to Amazon ECR.
- Connect to your instance.
To deploy an Amazon EC2 instance
-
Open the Amazon EC2 console. (link)
-
Choose Launch Instances
-
For Name, enter
DockerBuilder. -
In the Amazon Machine Image and Instance type section, leave the default values. These should be free teir eligable.
-
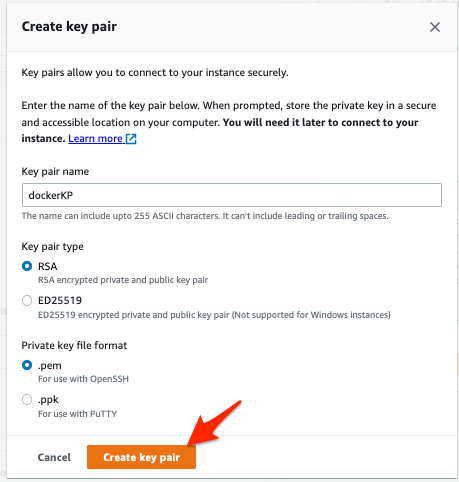
In the Key pair (login) section, do the following:
a. Choose Create new key pair. These steps will allow you to connect to your new instance.
b. For Key pair name, enter
dockerKP.c. Leave Key pair type and Private key file format at their default values.
d. Choose Create key pair. The key pair will be downloaded to your computer.
-
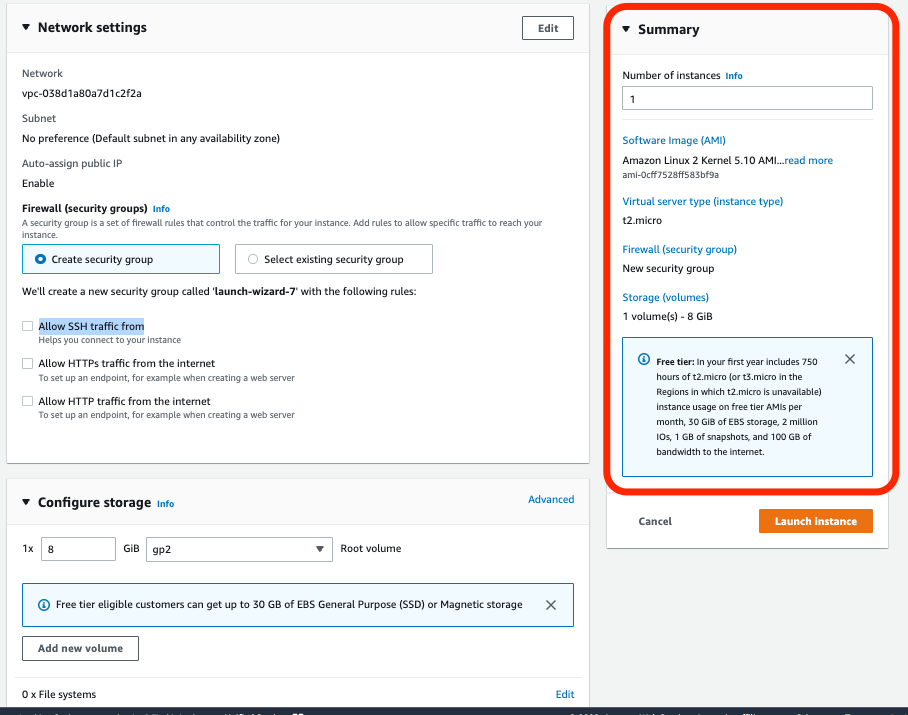
In Network settings section, clear Allow SSH traffic from.
-
Leave the rest of the settings at their default values.
-
Review the Summary box.
-
Choose Launch instance.
The EC2 instance will now be launched for use. Note the successful launch of the instance and choose View all instances
Now that you have launched the instance, you will assign the instance a role to you will allow your instance to push images to Amazon ECR. Roles contain policies that define what you, users and resources are permitted to do on an AWS account.
To add instance role
-
Verify the instance you just created is running.
-
Select the
DockerBuilderinstance. -
On the Action menu, choose Security, submenu Modify IAM role.
 .
. -
In the IAM Roles page, do the following:
a. Choose Create role.
b. Choose Trusted entity type as AWS service.
c. Choose the Common use cases as EC2.
d. Choose Next.
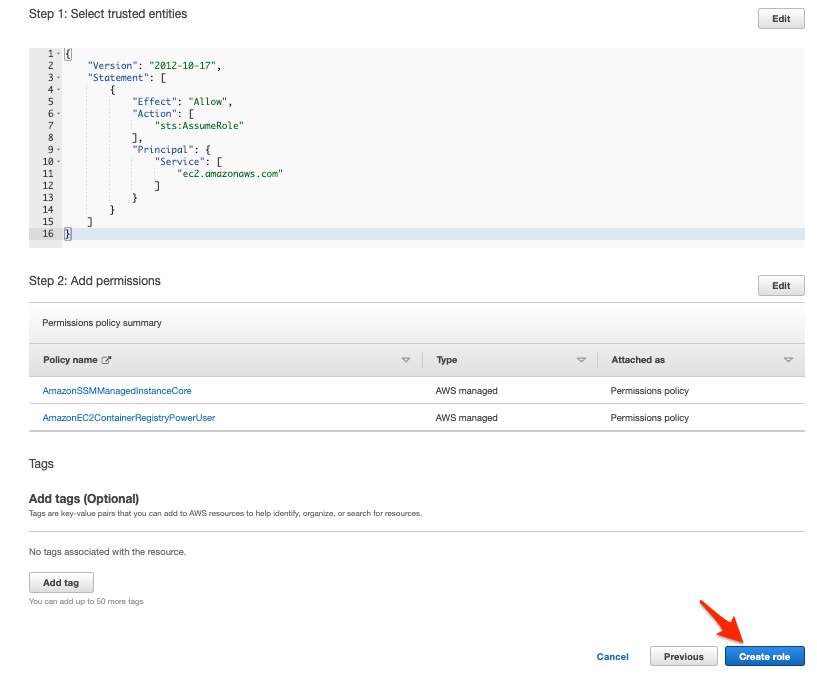
e. In the search bar, enter
AmazonEC2ContainerRegistryPowerUser(IAM role)f. Select
AmazonEC2ContainerRegistryPowerUser.g. Choose Clear filters.
h. In the search bar, enter
AmazonSSMManagedInstanceCore.i. Select
AmazonSSMManagedInstanceCore. You should now have selected 2 Permissions policies.j. Choose Next.
k. For Role name, enter
DockerBuilderRole.l. Leave the remaining sections with the default values.
m. Choose Create role.
-
Open the Amazon EC2 console. (link)
-
Select the
DockerBuilderinstance. -
On the Action menu, choose Security, submenu Modify IAM role.
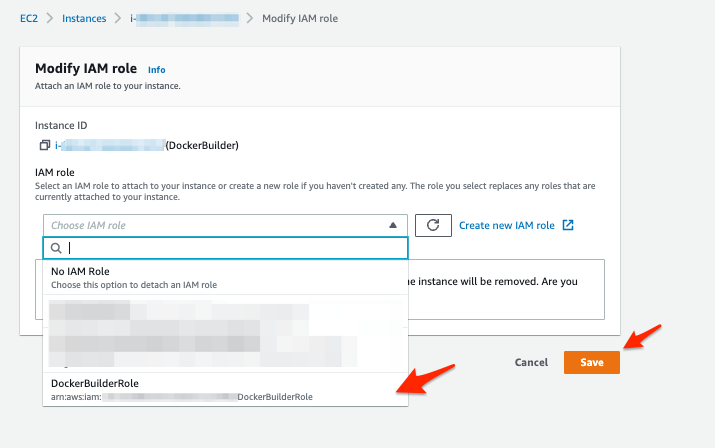
-
For IAM role, choose the
DockerBuilderRoleyou just created. -
Choose Save.
You now added the role you needed to your EC2 instance. Now we are going to connect to the instance.
To connect to your instance
You now connect to the instance and will proceed to the next steps.
- Verify the instance you just created is running.
- Select the
DockerBuilderinstance. - On the Action menu, choose Connect.
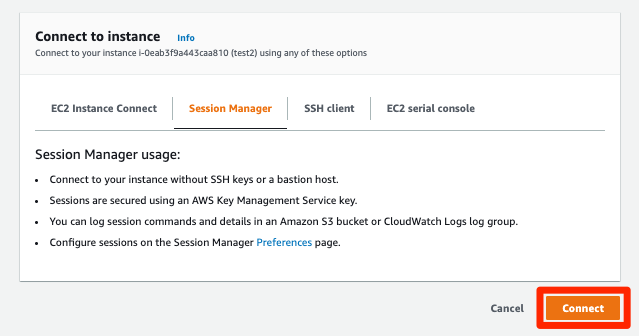
- Connect to your instance. There are multiple ways to connect to your instance. This workshop will use Session Manager to connect to the EC2 instance securely. You may need to wait a few minutes for the option to connect to become available.
You have now:
- Deployed an Amazon EC2 instance
- Assigned an Amazon IAM role to grant your instance the right to push containers to Amazon ECR.
- Connected to your instance.
Next Steps
Next you will install Docker onto this instance.